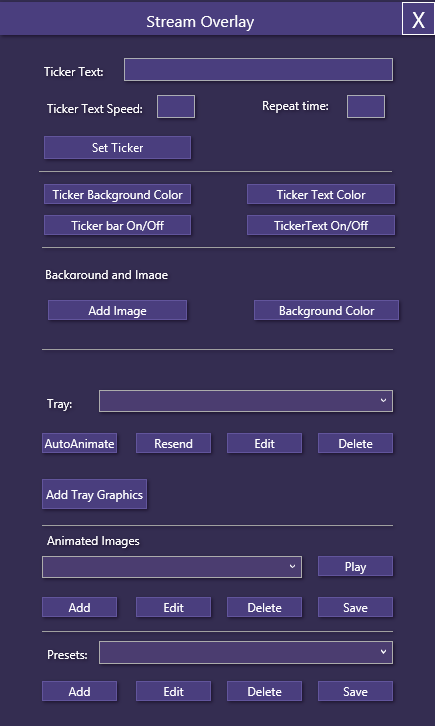
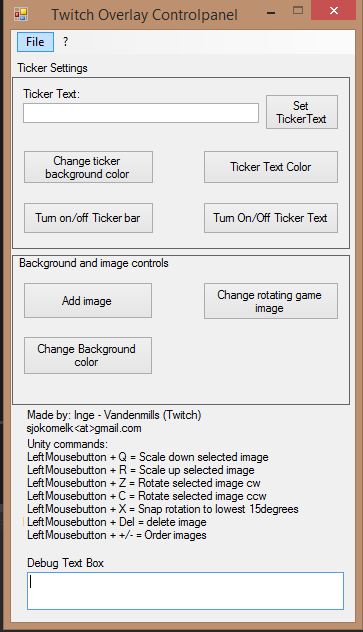
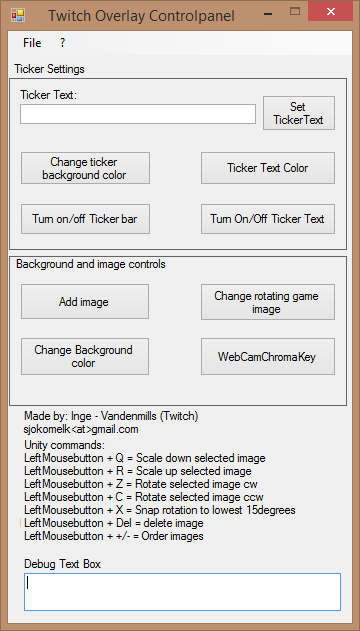
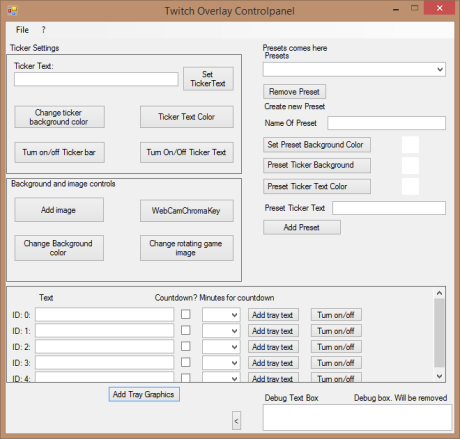
I didn’t know that it has been this long since I last blogged anything, but I’ve been busy with the program I’m working on. There’s been some progress, but also some setbacks. Mostly the setbacks have been caused by unexpected behaviors and poor planning. Yes, poor planning, but in all honesty most of this program started with just a test and then evolved into a test. Then I showed that test to someone and I got inspired to continue working on it. Which means that before I started I didn’t really plan on the amount of features that the program currently has. The program parts currently looks like the images below.
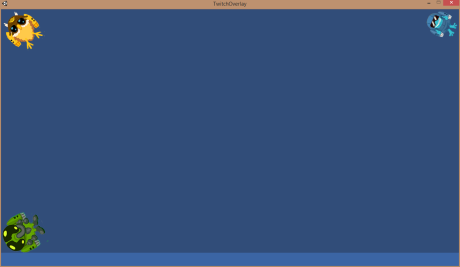
Overlay
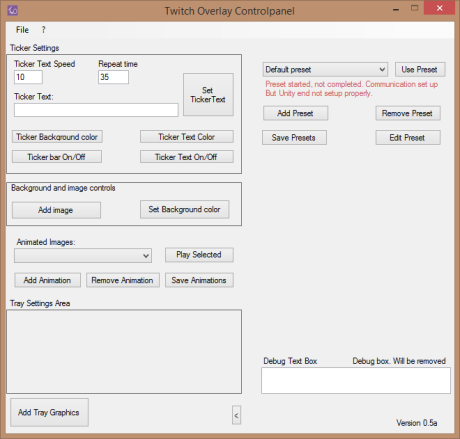
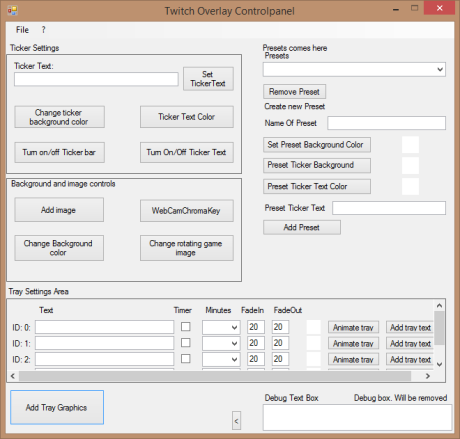
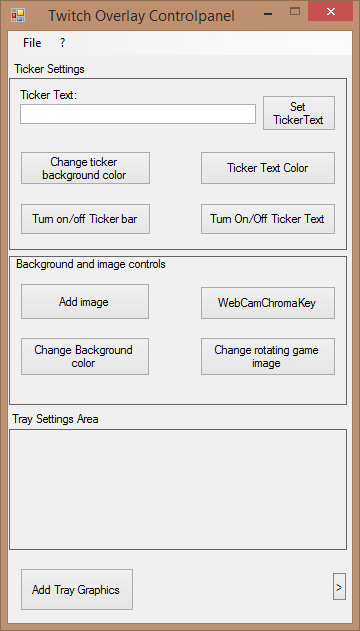
Control Panel (Yes, I am aware of the misalignment between the buttons)
Setbacks
Since I haven’t had much time to plan anything, some of the programming I did in the early stages was done just to get things to work. One example of this was before I discovered serializing. Serializing in C# is very easy, in fact it’s so easy to do that when creating files in the future, that’s the method I prefer to do. There’s in principle 3 steps, here’s one snippet from code I am currently using:
XmlSerializer formatter = new XmlSerializer(typeof(List<Preset>));
Stream stream = new FileStream(settingFilename, FileMode.Create, FileAccess.Write, FileShare.None);
formatter.Serialize(stream, listOfPresets);
But before I discovered that simple way of writing to file and reading from file, I used a far more complex way, this is an example of that using an XML reader and reading each tag:
string xmlContent = File.ReadAllText(“.\\settings.xml”);
XElement xmlElements = XElement.Parse(xmlContent);
List<XElement> xmlElementList = xmlElements.Elements().ToList();
for (int i = 0; i < xmlElementList.Count; i++)
{
List<XElement> subElements = xmlElementList[i].Elements().ToList();
if (xmlElementList[i].Name == “WindowBGColor”)
(……) And additional 50 lines of code
Quite a difference in code and how easy it is to maintain. If the class changes all I need is the [Serializable] on the classes I add and the code doesn’t have to change at all. The setback was that I needed to rewrite the code, although in the end it was less code than I started with. But that means it is easier to maintain.
The other setback I had was that when I first started I had everything in so called packages. The thought behind it was that in the beginning i wanted to create packages sent through a named pipe. The named pipe required to know the length of the data and a buffer. I created a system where I send a type of package, length and data. But I have since changed from named pipe to UDP, but the packages still worked as I wanted them to work. So I kept the name. But I was locked into packages and thus created all kinds of package this, package that, because I wanted to have the same type on receiving and sending side. This package thought crept into other parts of the program and before I knew it I had Tray, TrayPackage and TrayData. Preset, PresetData, PresetPackage. And so on and so forth.
Some of the reasoning, if you can call it that, was that I needed to have the same datatype on the Control Panel as in the Overlay part. I have since moved away, I needed to rewrite a whole lot of code. I unified all classes having more than 1 of a similar type into one of each. So instead of Tray, Traydata and TrayPackage, I now have Tray. Instead of Preset, PresetData, PresetPackage I only have Preset. There are a few other examples, not as bad, but some had two of the same type. All of that costs time to redo and make sure that what worked before still works after changing it.
But it doesn’t stop there. Another setback was that I didn’t know I could use serialization to send data more reliably as well. Honestly I didn’t know of serialization when I started sending the “big” classes through UDP either. So I constructed a key system. The sender would construct the class into one single string. The keys were used to know where the string started and where it stopped. That way I could extract the part I needed.
The problem was that once I needed to change the class, I needed to construct a new key. I had however created a system making it easy to extract the key, so adding keys was not really a problem, but each key made the code less readable and I needed to add it on both sending and receiving end without any spelling errors.
Since both end didn’t have the same class, I created a way to serialized the individual parts that were the same and create a byte buffer from that and send that through to unity and decode that with a deserialize on the other end. That worked much better. The code, not so much smaller, a tiny bit, but not as much as I had hoped. Since the serialization method that is built in only works for basic types I had to break the class up in those parts, but that said, the serialization/deserialization method works well on both sides.
Progress
Despite all the setbacks and rewrite of code, which I nearly expected to do, I have made great strides. For instance now scenes are saved upon exit, but not just the images you add, but the trays as well. Rotation, scale, position are all saved. If you have a tray you wanted automated, it still is automated. Presets also clear the scene and add all the objects. If the preset has been used once before it checks the position, scale and rotation of the objects and sets them to the saved position. These positions are saved automatically.
I have also added two default presets that are a bit special. The reset scene preset that resets the scene to a default color and a default scene, which is more or less a playground to test the different functions out. It is possible to use it as a preset and it is the preset that is loaded by default.
The second part is an animator. This took far more work than I intended, at first I figured it would just be a rotating image that scaled in, then stayed on screen and then faded out while rotating out. By the time I figured I would need fade in, fade out, rotate in and rotate out timers, I figured, why not let the users set all the settings themselves? Which is what I did. Users can now decide if they want to rotate an image in, how big the image should be at the end, how fast the animation should go. At what point in time the animation should start to fade in, fade out, rotate in, rotate out, scale up and scale down. That does mean the users can mess it up, but if it doesn’t work, it shouldn’t be a problem. The animation system also works independently from presets.
Summary
Despite all the setbacks, I feel like the progression has gone forward. Now I need to take a step back. Create a plan for what I want to do forward. There are 2 features I want to implement, both I have experimented with and have managed to get working. The first feature is the miniature ticker. The miniature ticker will be used to show for instance who has donated last, latest followers and latest subscriber, to mention just a few examples. Right now the problem is that I need to figure out how to measure the length of a textmesh and there’s not too much documentation on how to do just that. Once I figure out that I can get the text to wrap around so to speak.
The second thing I want to accomplish is to do one of two. Either that the control panel sets the twitch information to Unity and that checks in certain intervals if the most recent subscriber / follower and handles that automatically. That sounds like the best solution on paper, however if twitch goes down Unity might start lagging and using a lot of cpu to try to connect. Second option is to use the control panel for that, but that means the control panel needs to be up at all times. Third option, which is probably what I am going for is to create a separate thread that sleeps for half a second and then checks. Then once there’s something new it updates the information. If that thread suddenly takes a while longer the program might take up more cpu, but at least it won’t crash or occupy the rest of the program.
If I do it on the control panel side, it wouldn’t be that problematic if something went wrong, but that also means the user need the control panel up at all times. Which is something I didn’t intend on. If the user wanted to they should be able to close the control panel. But in order to get the twitch connection to work, if i go with the control panel route, it has to stay open. First and foremost however I need to get more people to try it. Get their feedback and see what they need.